PWCT 1.9 Art Documentation ( http://doublesvsoop.sourceforge.net )
2006-2013, Mahmoud Fayed ( msfclipper@users.sourceforge.net )
Detailed Harbour Programming Language - Waseem Salem El-Mofty | Syria
Documentation
Table of contents
1 - Introduction
2 - Implementation steps
3 - Final Steps Tree
4 - Application during the runtime
1 - Introduction
In this lesson we are going to create (Hello ,World) application using DetailedHarbourPWCT
2 - Implementation Steps
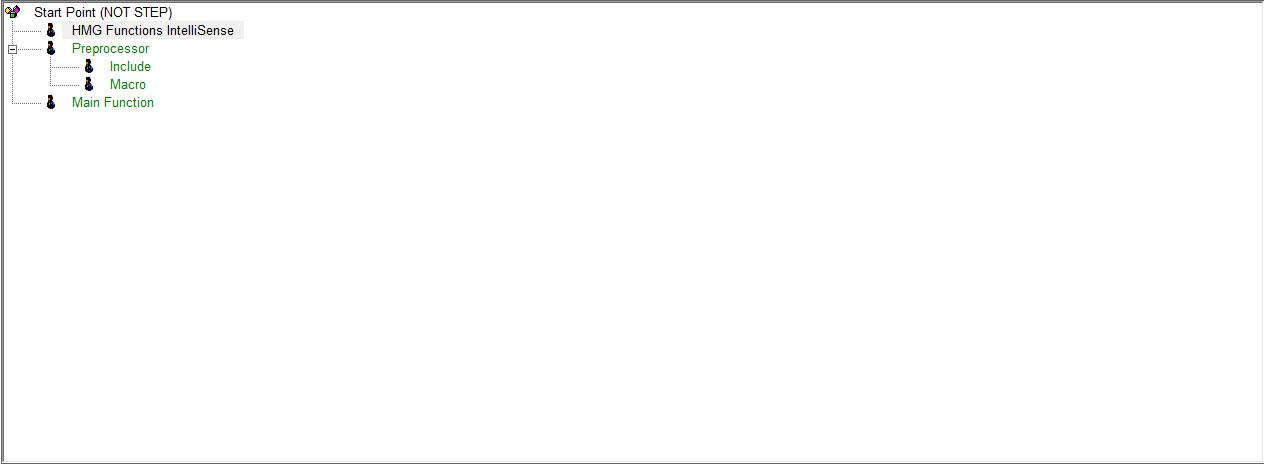
Fig. (1) Goal Desginer - Steps Tree
Select the step (HMG Functions IntelliSense)
We will start now new interaction process to generate new steps to our steps tree.
The slow way (Using Mouse):
��������������� 1 - Click Interact to open the components browser
��������������� 2 - Select the domain (Specific (HarbourInDetailsPWCT))
��������������� 3 - Select the component (HMG IntelliSense)
The fast way (Using Keyboard shortcuts):
��������������� 1 - Get the component using its name by typing (HMG IntelliSense)
��������������� Note : Stop typing when you see the required component is selected
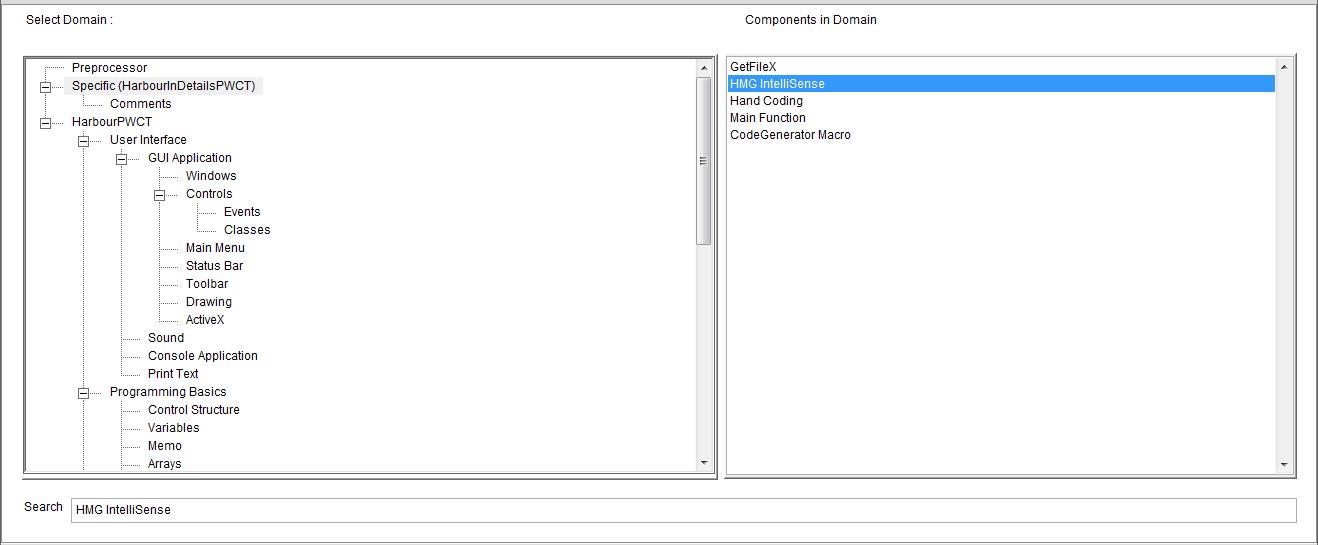
Fig. (2) Component Browser � Select the component (HMG IntelliSense)
After selecting the component click Ok or press ENTER

Fig. (3) Interaction page - Set the properties and enter the required data as in the image above
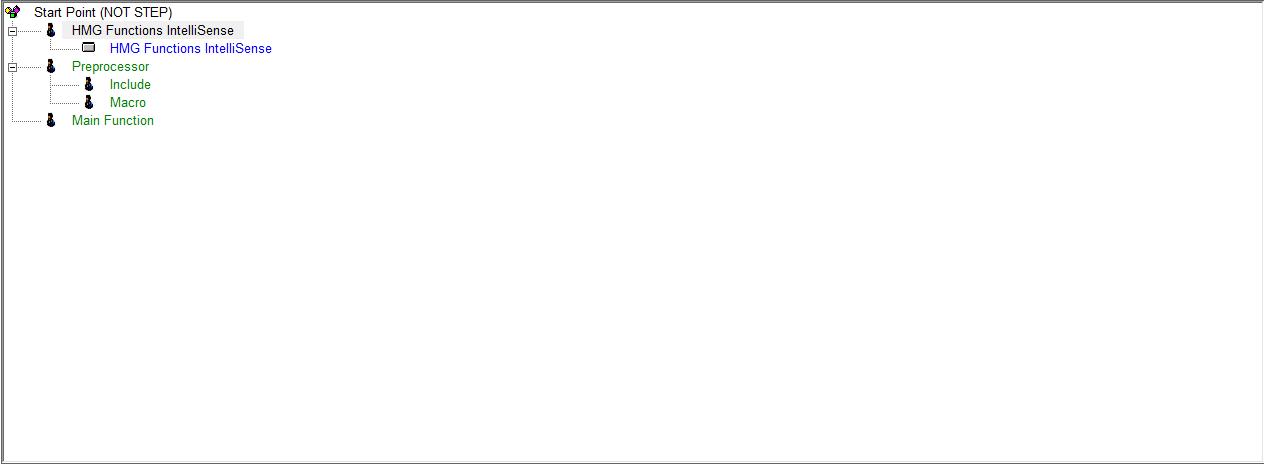
Fig. (4) Goal Desginer - Steps Tree
Select the step (Include)
We will start now new interaction process to generate new steps to our steps tree.
The slow way (Using Mouse):
��������������� 1 - Click Interact to open the components browser
��������������� 2 - Select the domain (Preprocessor)
��������������� 3 - Select the component (Pre Include)
The fast way (Using Keyboard shortcuts):
��������������� 1 - Get the component using its name by typing (Pre Include)
��������������� Note : Stop typing when you see the required component is selected
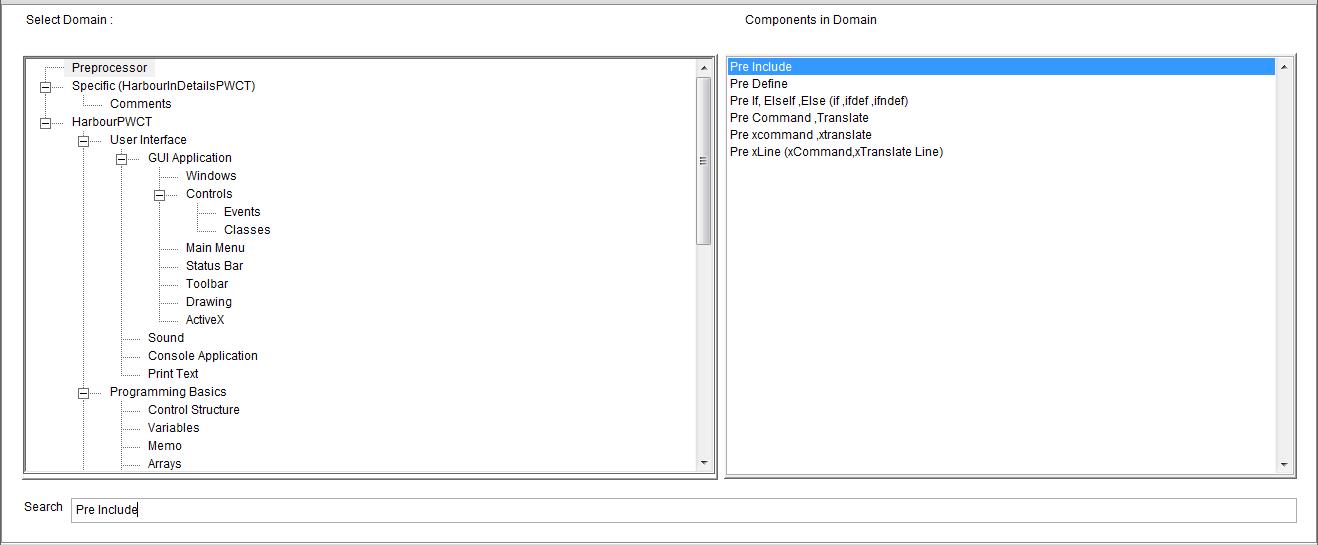
Fig. (5) Component Browser � Select the component (Pre Include)
After selecting the component click Ok or press ENTER
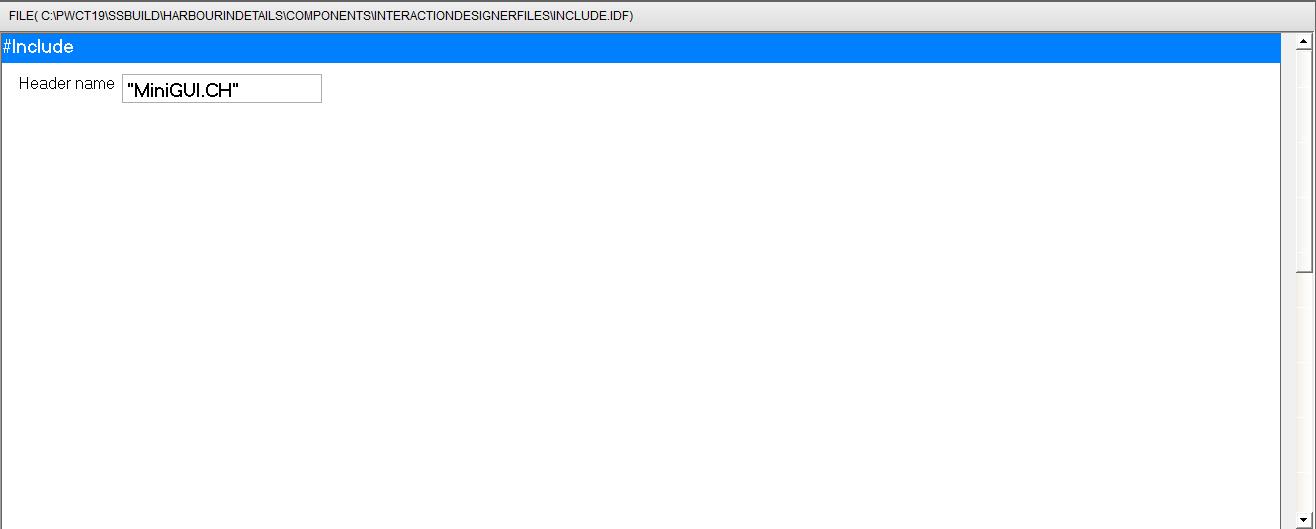
Fig. (6) Interaction page - Set the properties and enter the required data as in the image above
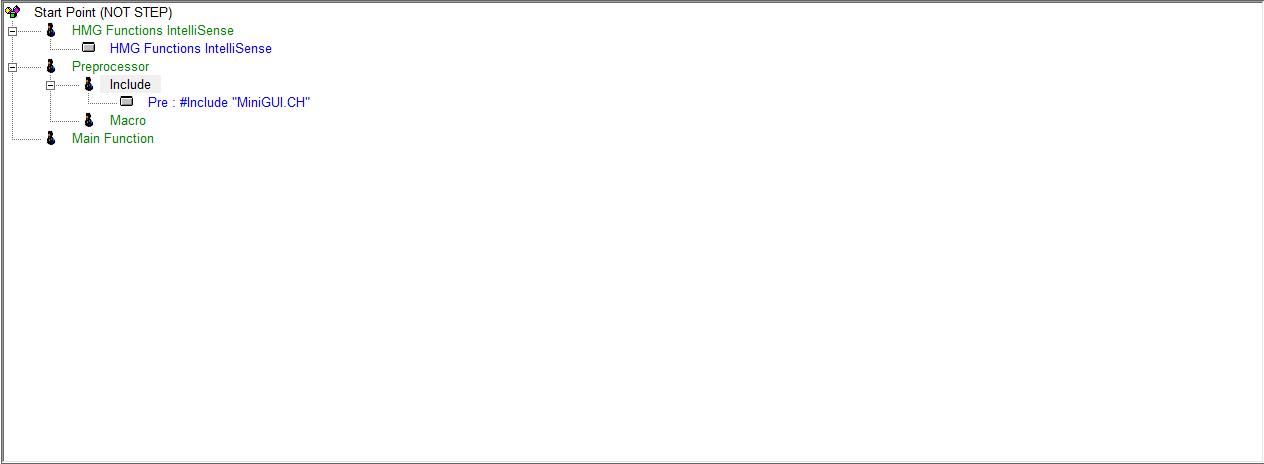
Fig. (7) Goal Desginer - Steps Tree
Select the step (Macro)
We will start now new interaction process to generate new steps to our steps tree.
The slow way (Using Mouse):
��������������� 1 - Click Interact to open the components browser
��������������� 2 - Select the domain (Specific (HarbourInDetailsPWCT))
��������������� 3 - Select the component (CodeGenerator Macro)
The fast way (Using Keyboard shortcuts):
��������������� 1 - Get the component using its name by typing (CodeGenerator Macro)
��������������� Note : Stop typing when you see the required component is selected
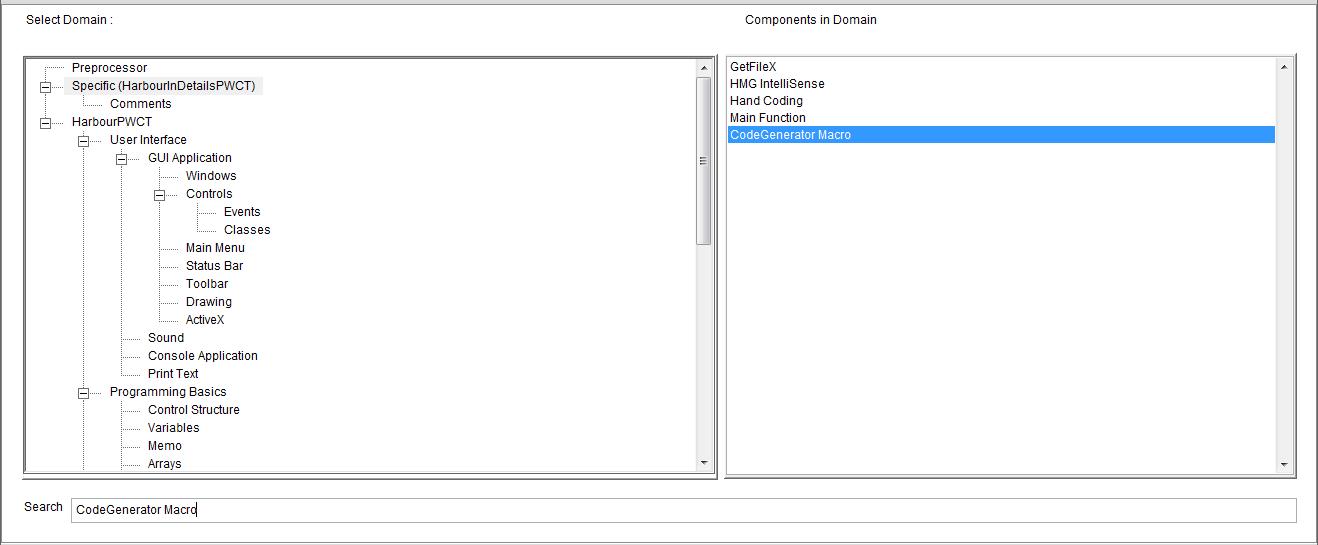
Fig. (8) Component Browser � Select the component (CodeGenerator Macro)
After selecting the component click Ok or press ENTER
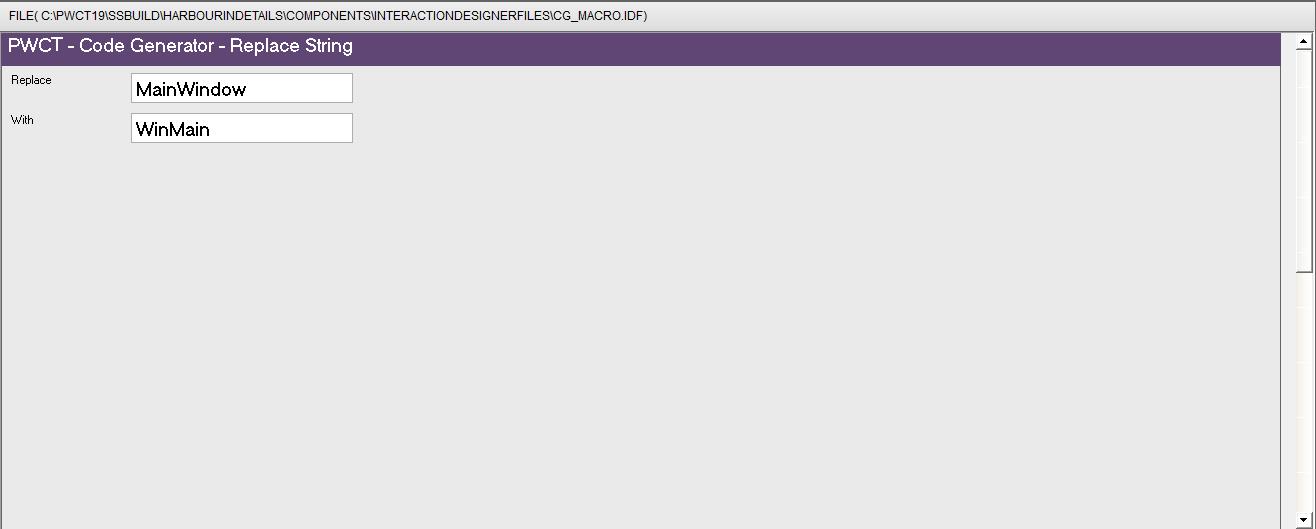
Fig. (9) Interaction page - Set the properties and enter the required data as in the image above

Fig. (10) Goal Desginer - Steps Tree
Select the step (Main Function)
We will start now new interaction process to generate new steps to our steps tree.
The slow way (Using Mouse):
��������������� 1 - Click Interact to open the components browser
��������������� 2 - Select the domain (Specific (HarbourInDetailsPWCT))
��������������� 3 - Select the component (Main Function)
The fast way (Using Keyboard shortcuts):
��������������� 1 - Get the component using its name by typing (Main Function)
��������������� Note : Stop typing when you see the required component is selected
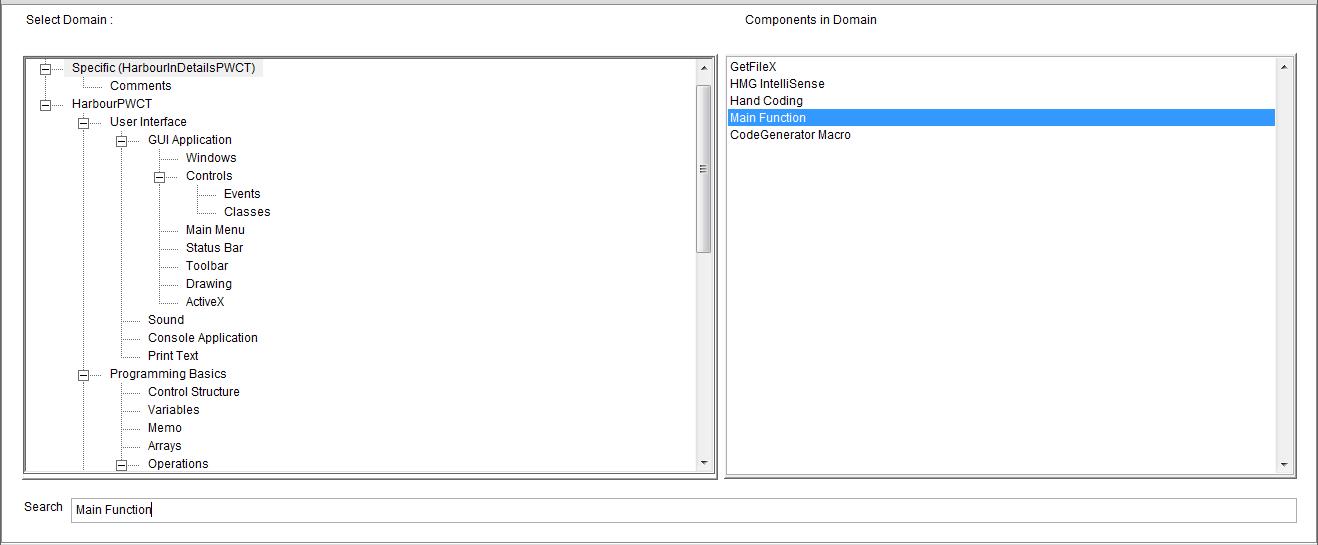
Fig. (11) Component Browser � Select the component (Main Function)
After selecting the component click Ok or press ENTER
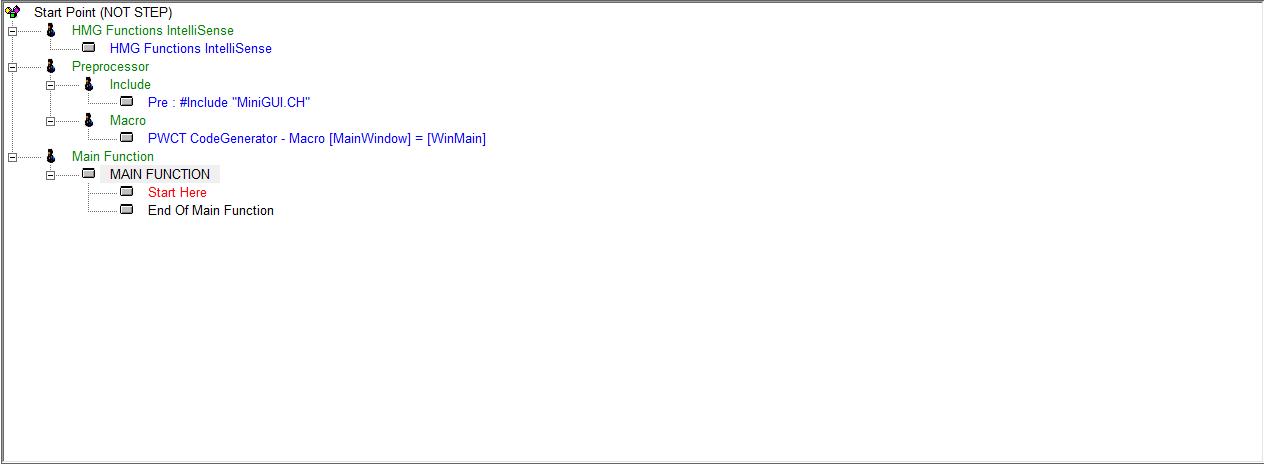
Fig. (12) Goal Desginer - Steps Tree
Select the step (Start Here)
We will start now new interaction process to generate new steps to our steps tree.
The slow way (Using Mouse):
��������������� 1 - Click Interact to open the components browser
��������������� 2 - Select the domain (Windows)
��������������� 3 - Select the component (Define New Window)
The fast way (Using Keyboard shortcuts):
��������������� 1 - Get the component using its name by typing (Define New Window)
��������������� Note : Stop typing when you see the required component is selected
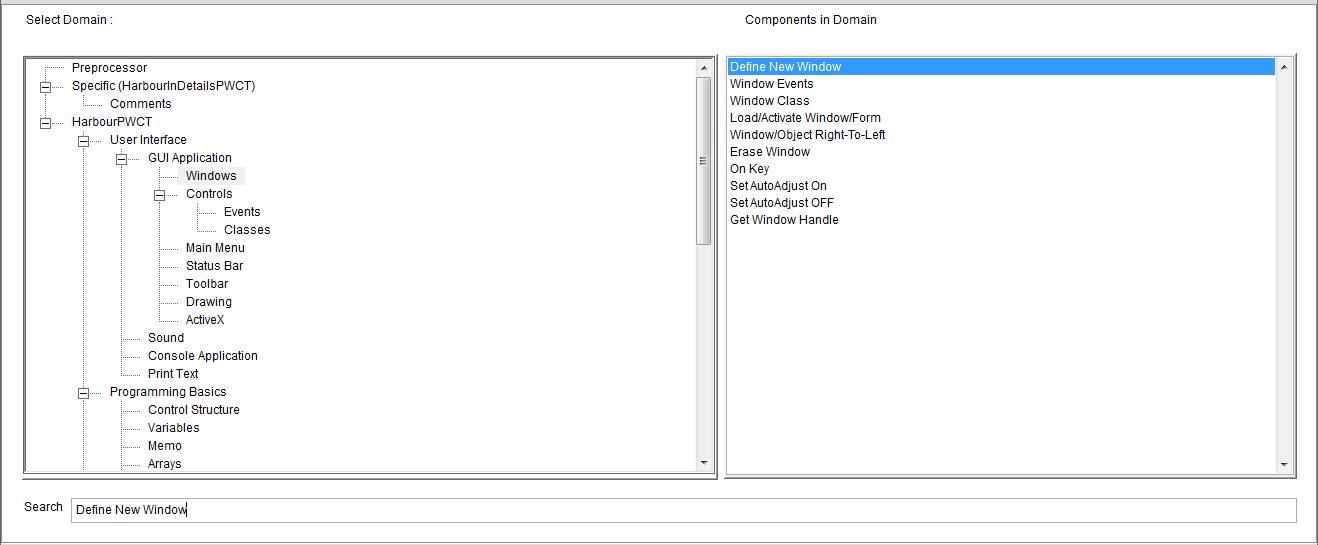
Fig. (13) Component Browser � Select the component (Define New Window)
After selecting the component click Ok or press ENTER

Fig. (14) Interaction page - Set the properties and enter the required data as in the image above

Fig. (15) Goal Desginer - Steps Tree
Select the step (Window Properties)
We will start now new interaction process to generate new steps to our steps tree.
The slow way (Using Mouse):
��������������� 1 - Click Interact to open the components browser
��������������� 2 - Select the domain (Windows)
��������������� 3 - Select the component (Window Class)
The fast way (Using Keyboard shortcuts):
��������������� 1 - Get the component using its name by typing (Window Class)
��������������� Note : Stop typing when you see the required component is selected
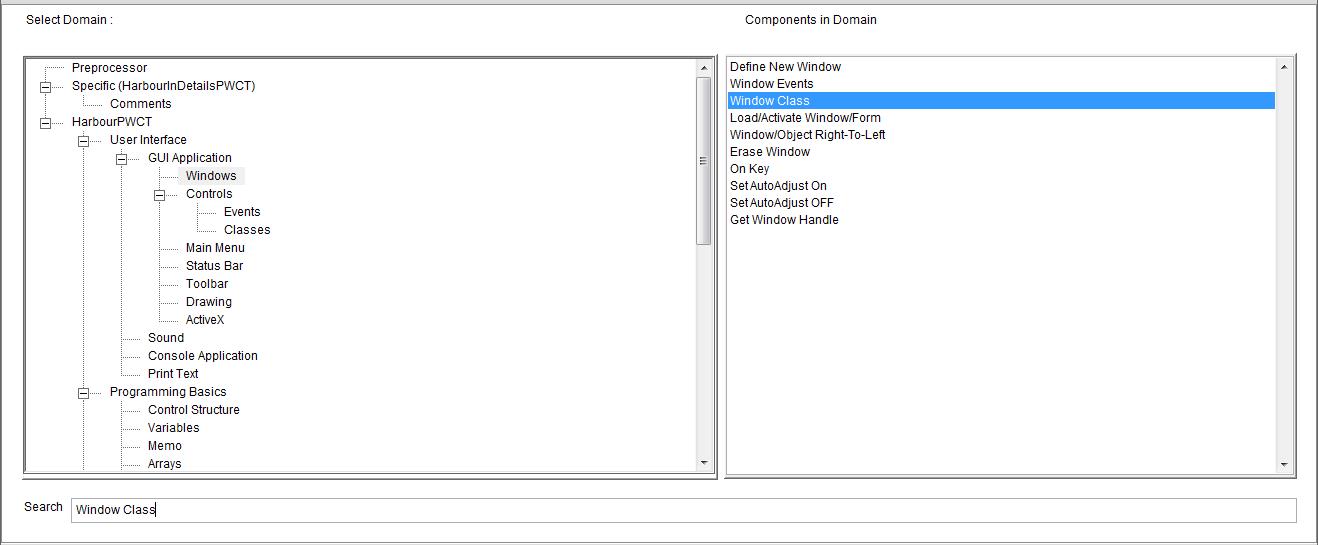
Fig. (16) Component Browser � Select the component (Window Class)
After selecting the component click Ok or press ENTER

Fig. (17) Interaction page - Set the properties and enter the required data as in the image above
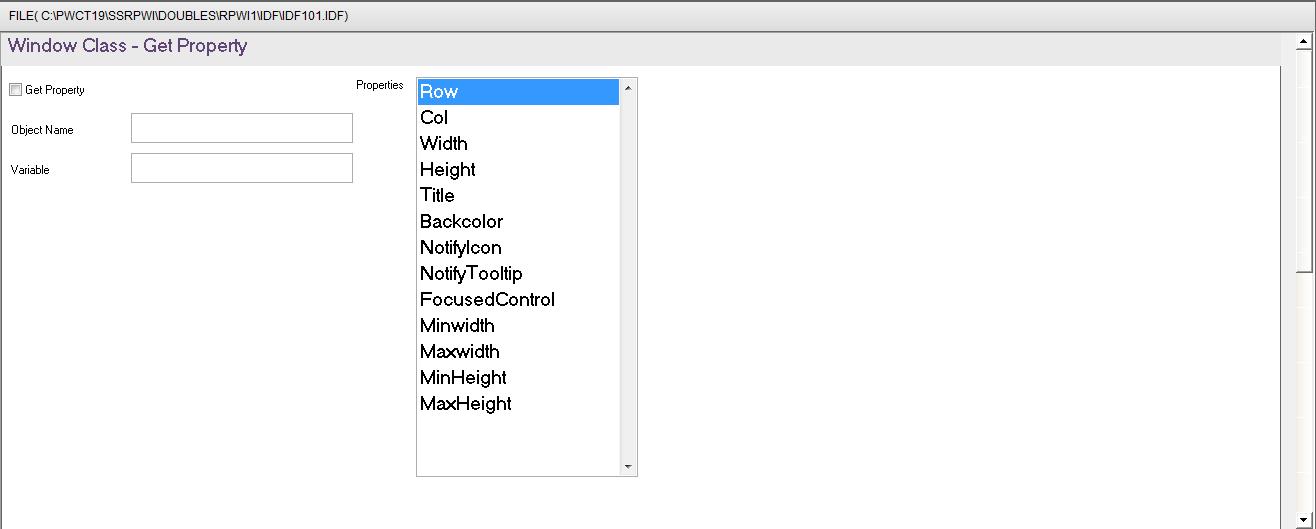
Fig. (18) Interaction page - Set the properties and enter the required data as in the image above
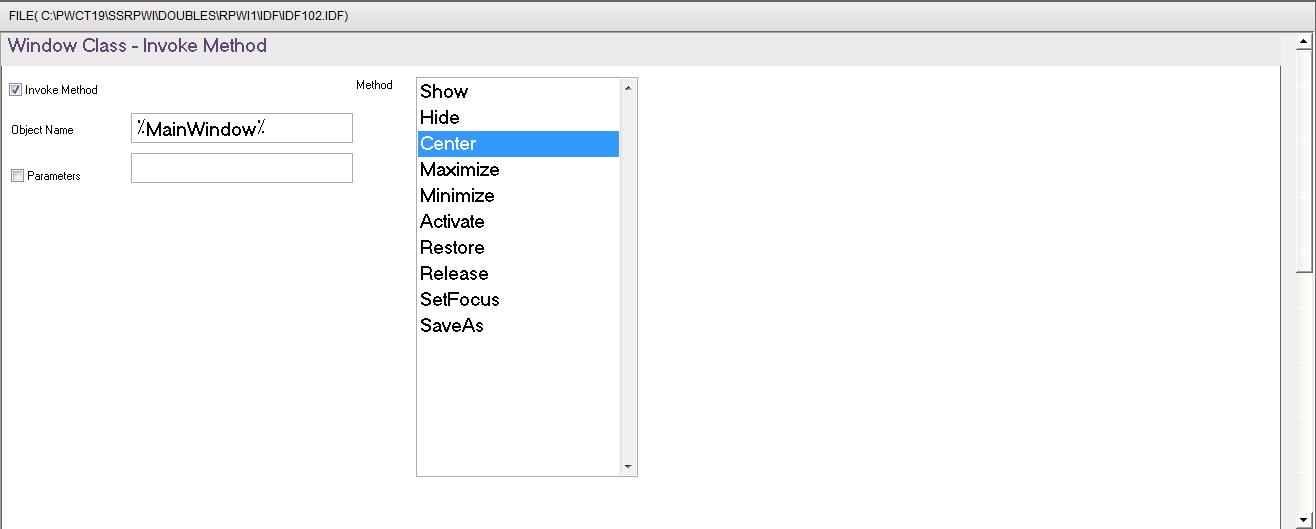
Fig. (19) Interaction page - Set the properties and enter the required data as in the image above
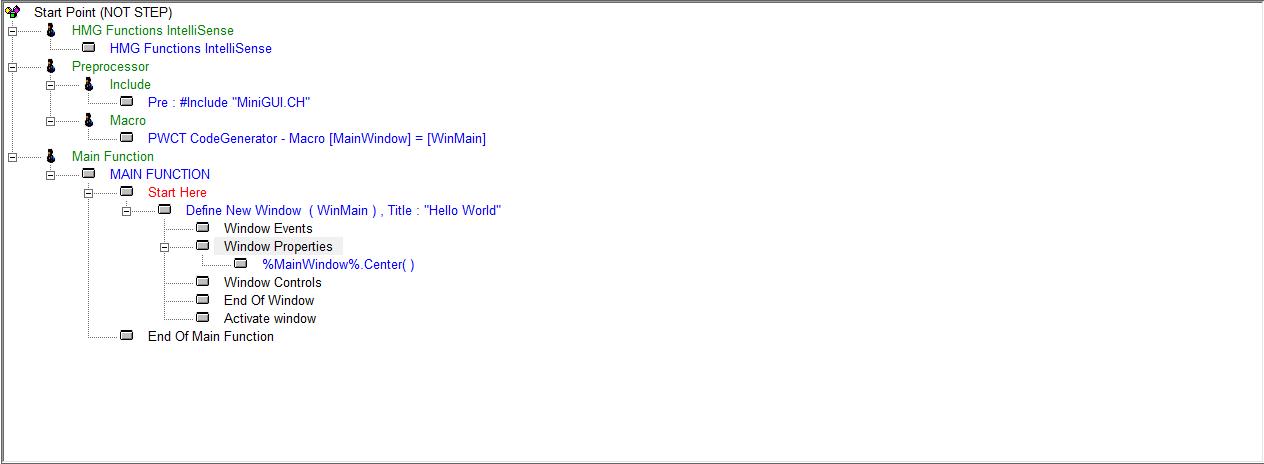
Fig. (20) Goal Desginer - Steps Tree
Select the step (Window Controls)
We will start now new interaction process to generate new steps to our steps tree.
The slow way (Using Mouse):
��������������� 1 - Click Interact to open the components browser
��������������� 2 - Select the domain (Controls)
��������������� 3 - Select the component (Label)
The fast way (Using Keyboard shortcuts):
��������������� 1 - Get the component using its name by typing (Label)
��������������� Note : Stop typing when you see the required component is selected

Fig. (21) Component Browser � Select the component (Label)
After selecting the component click Ok or press ENTER
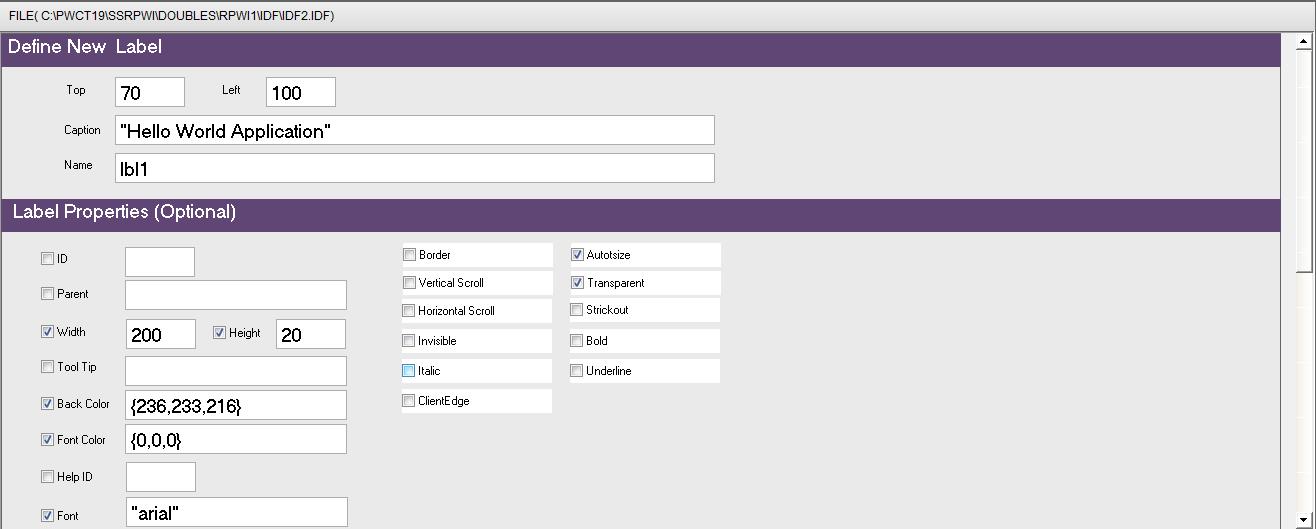
Fig. (22) Interaction page - Set the properties and enter the required data as in the image above
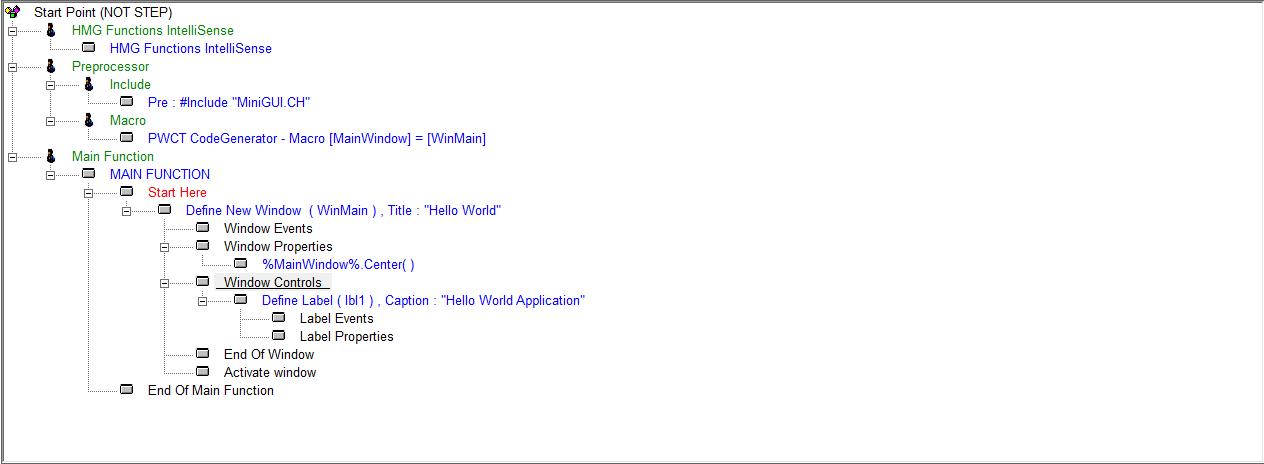
Fig. (23) Goal Desginer - Steps Tree
Select the step (Window Controls)
We will start now new interaction process to generate new steps to our steps tree.
The slow way (Using Mouse):
��������������� 1 - Click Interact to open the components browser
��������������� 2 - Select the domain (Controls)
��������������� 3 - Select the component (Label)
The fast way (Using Keyboard shortcuts):
��������������� 1 - Get the component using its name by typing (Label)
��������������� Note : Stop typing when you see the required component is selected
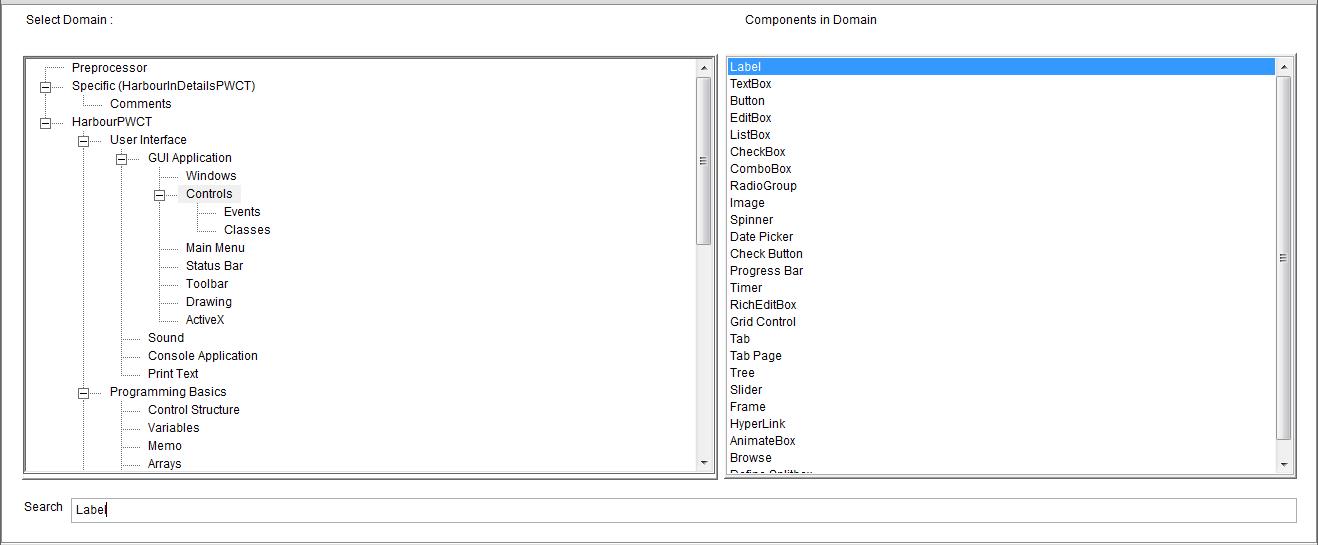
Fig. (24) Component Browser � Select the component (Label)
After selecting the component click Ok or press ENTER
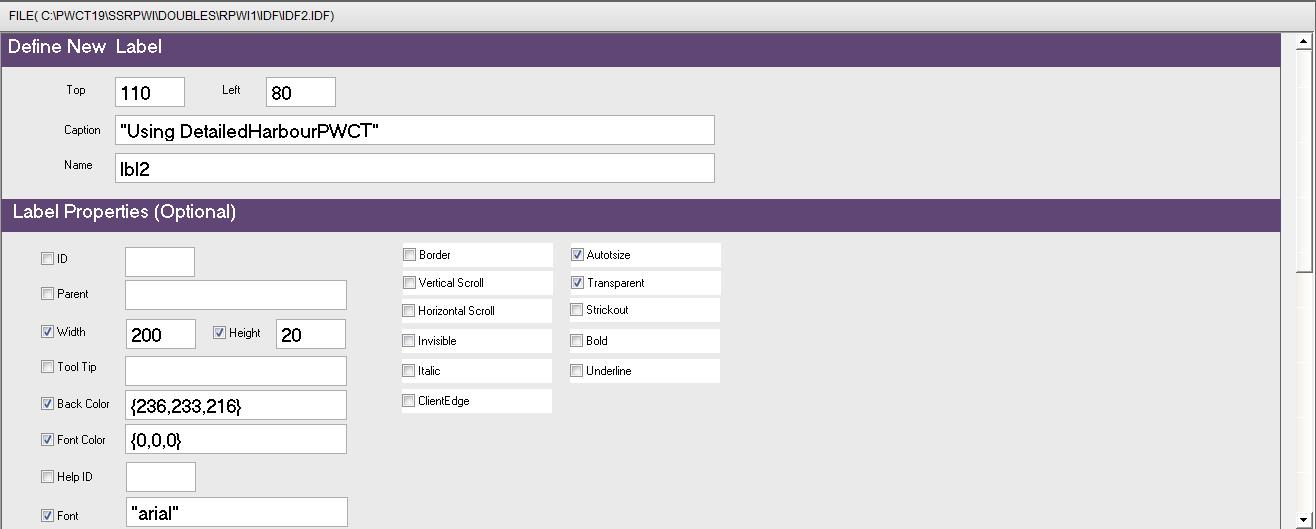
Fig. (25) Interaction page - Set the properties and enter the required data as in the image above
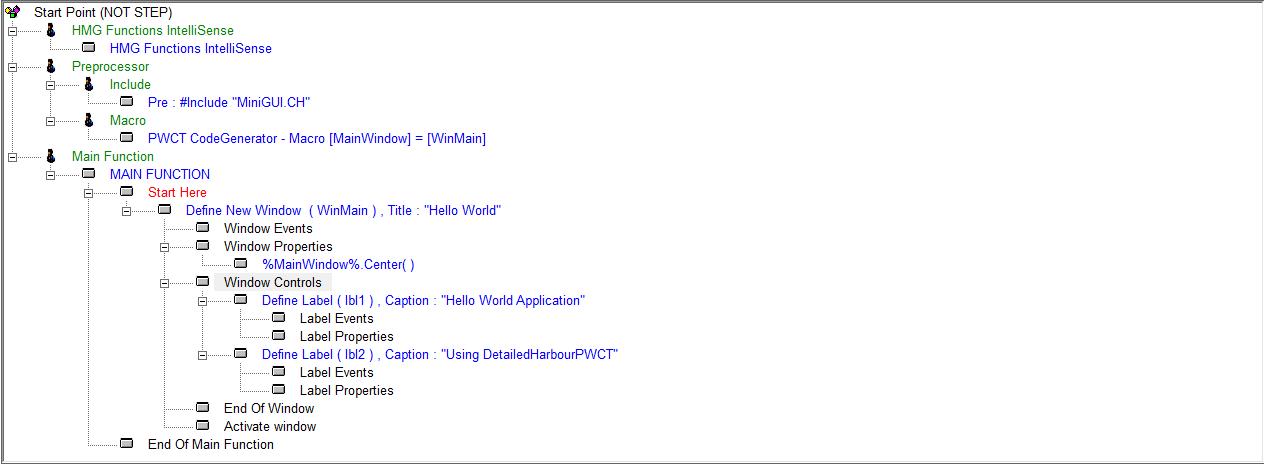
Fig. (26) Goal Desginer - Final Steps Tree
3 - Final Steps Tree
HMG Functions IntelliSense
��������������� HMG Functions IntelliSense
Preprocessor
��������������� Include
��������������� ��������������� Pre : #Include "MiniGUI.CH"
��������������� Macro
��������������� ��������������� PWCT CodeGenerator - Macro [MainWindow] = [WinMain]
Main Function
��������������� MAIN FUNCTION
��������������� ��������������� Start Here
��������������� ��������������� ��������������� Define New Window ( WinMain ) , Title : "Hello World"
��������������� ��������������� ��������������� ��������������� Window Events
��������������� ��������������� ��������������� ��������������� Window Properties
��������������� ��������������� ��������������� ��������������� ��������������� %MainWindow%.Center( )
��������������� ��������������� ��������������� ��������������� Window Controls
��������������� ��������������� ��������������� ��������������� ��������������� Define Label ( lbl1 ) , Caption : "Hello World Application"
��������������� ��������������� ��������������� ��������������� ��������������� ��������������� Label Events
��������������� ��������������� ��������������� ��������������� ��������������� ��������������� Label Properties
��������������� ��������������� ��������������� ��������������� ��������������� Define Label ( lbl2 ) , Caption : "Using DetailedHarbourPWCT"
��������������� ��������������� ��������������� ��������������� ��������������� ��������������� Label Events
��������������� ��������������� ��������������� ��������������� ��������������� ��������������� Label Properties
��������������� ��������������� ��������������� ��������������� End Of Window
��������������� ��������������� ��������������� ��������������� Activate window
��������������� ��������������� End Of Main Function
4 - Application during the runtime